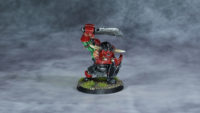
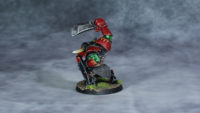
Lords of WarCry – Da Redfists, Part 2
Each Ardboy has its own name (even on the underside of the base) and individual character, but all have the same style of paint scheme. I often paint according to certain "recipes", in order to not forget how I did it and to get a homogenous look. With ordinary orcs I wouldn't mind, but Ardboys have a certain talent for discipline and order (in greenskin measures). So I had to be able to create the same colors on more than one model.
For the first two Ardboys I used old blackorcs made of pewter. Although I am not a friend of metal miniatures, these were better for practicing than the new plastic models. The surfaces are clearly divided into chain mail, skin, plates, fabric, belts and teeth.
Morog
A shield wall is a good method to delve deep into the turmoil of battle and the Redfists have almost perfected this method. The shield-bearers push themselves slowly forward in an indicated v-shape, only to suddenly stop, while the boys with the big axes jump over them.
Although Morog is quite a simple model, it was an interesting experience to paint him, especially his shield. Below is the recipe for painting the Redfists.
Chain mail
In order to avoid a later mess by the flying pigments, I drybrushed the chain mail parts first with a dark silver and afterwards with a brighter one. You can vary the degree of brightness as you like, depending on your own taste.
If you want to focus the attention on a special spot, you can accentuate some of the chain rings again by hand.
Skin
I have been developing a fairly simple procedure here for a long time. The basic tone is Sick Green (Vallejo Game Color), where I paint a darker green strongly diluted into the recesses. The first highlight is a 1:1 mix of Sick Green and Goblin Green (Army Painter). The next accent is pure Goblin Green. Finally there are three more accents where I always add some white. Always make sure to leave some of the previous colour visible.
Cloth and Beltstraps
I painted the trousers with Charred Brown (VGC) as base color, because this tone is much darker than Beasty Brown. I shaded the recesses by adding black, but the highlights were highlighted with Bonewhite (VGC) until I used almost pure Bonewhite for the last accent.
The belts were given Beasty Brown (VGC) as the base colour and were shaded and accentuated by the same pattern. However I like to mix some white in the last accent to show some points of tension on the leather.
Plate
It got really exciting with the plate armor, because I wanted to paint it partly in red and partly in black to have a connection to the Bloodtoofs color scheme. I started with the red plates, because I would be able to correct mistakes if I painted the black plates afterwards.
These got dark edge accents by always adding more Cold Grey (VGC) into black. Most of the time after three steps I used pure Cold Grey for a thin accent which I brightened once or twice by adding white. Especially at the corners an accent almost in pure white is important to give the metal feeling.
Red got a base layer of Mechrite Red (Games Workshop). However, this is only a carrier layer, the actual base color is Mephiston Red (GW). I shaded the plates with Agrax Earthshade and added a bit of black if neccessary. The first accent consisted of a 1:1 mixture of Mephiston Red and Wild Rider Red (GW), followed by pure Wild Rider Red. Again, I made sure to always leave a little of the previous accent visible. Then I added a little Bronzed Fleshtone (VGC) to the Mechrite Red. Don't overdo it, or the first accent will be too hard. Then I added a tiny amount of white again.
At this point you can decide - either you make an additional highlight with a little more white, which is smaller, or you take white directly and put dots on the corners or very sharp edges of the plates. This will look something like this:
Teeth
The tusks are also an old recipe: the base layer is a dark brown. It doesn't matter which one is used, because it only serves as a carrier layer again. The entire tooth is then painted with Plague Brown (VGC). Bonewhite is now painted in stripes to create the effect of ridges afterwards. The whole tooth is now shaded with slightly diluted Agrax Earthshade (GW). When the wash is dry, the ridges are smoothed again with Bonewhite, but this time only up to about half of the tooth. Finally, a white dot is placed either on the upper third if the ridges still need some finishing, or only on the tip if they are already clearly visible.
Well, I'm curious to see if anyone will dare to try the recipe. If you keep the order of the steps, you shouldn't have any problems with later details, because these are mostly on the top part of the surface and therefore easy to reach.
Greetings from the Chaosbunker
Dino


Leave a Reply